How To Lash a Tripod Together
Every bushcrafter should know how to lash together a secure tripod. In this post, I'll show you a little trick to lash together three poles to form a solid tripod.
But why might you need to make a tripod?
What is a tripod lashing used for?
A tripod forms a solid structure allowing you to fashion all sorts of campsite improvements. Here are some projects for where to use a tripod:
- The core of a natural brush shelter
- A mechanism to hang pots over the fire
- To hold a bowl for washing in
- To create camp furniture like a chair or even a table
- As a lantern holder
What equipment will you need to form the tripod?
Fortunately for campsite improvement projects like this, you won't need much equipment. Here's what you will need:
- A length of paracord - approx. 1 meter in length depending on the thickness of the poles you use.
- X3 straight poles of approximately equal thickness.
- A knife
- A lighter (optional)
If the length of paracord you are using is already the right length you won't need the knife. The lighter is just to melt the ends of the rope together to ensure it doesn't fray.

Step 1 - Clove Hitch
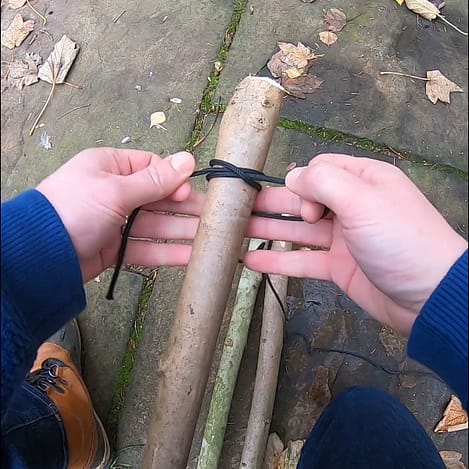
Tie a clove hitch 2 to 3 inches down the first pole.
For a detailed explanation of how to tie a clove hitch see "How To Tie a Clove Hitch" .
It's worth learning how to tie a clove hitch by heart as it is useful for other lashings.

Step 3 - Weave the running line around the poles
Weave the running line between the tripod legs at least 3 times each, 4 or 5 is ideal depending on access to cordage. This is the part of the knot which forms the lashing.
It's tempting to try and pull really tight as you would in other forms of lashing but you don't need to. In fact, being a little lose makes the process easier.

Step 4 - Tie off with an overhand knot
Use a simple overhand knot to tie off the lashing to the loose end of the clove hitch in step 1.
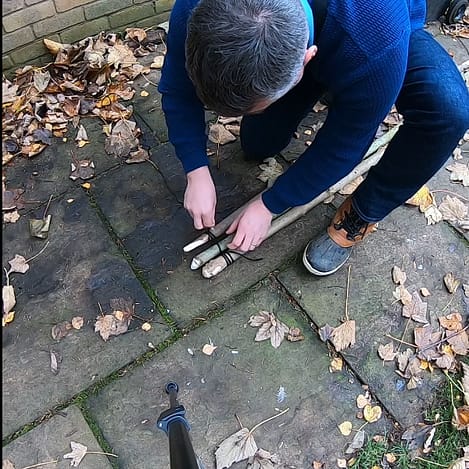
Make sure this knot is secure and tight. When you are happy with the end result the remaining lengths of string can be cut and brunt off to avoid fraying. You may notice the tripod legs are not yet held securely. This is okay.
Step 5 - Lift the middle pole over
This is where all the magic happens. Lifting the pole over twists the lashing pulling it tight.
If you find the knot isn't tight then undo this overhand knot and pull the lashing a little tighter and re-do the pole. This should if done correctly pull everything in tight and create a strong stable tripod. This pole over technique works well for tripod construction projects which require the tripod to be lashed together at the top. For tripods that need to be held in the middle, a different technique is required.


Step 6 - Spread the poles for stability
Spread the poles apart in a triangular fashion to create a strong structure.
This tripod lashing knot will bind in on itself to form a tight top to the tripod. But you may need to shape the base of the legs to a sharp point to allow them to get a firm purchase on the ground they sit on.
Conclusion
Every bushcrafter should know a solid tripod lashing knot. It forms the basis of a myriad of projects which can greatly improve the comfort and utility of your camp.
